Monday, 31 December 2007

Something Special

When I was little, a year seemed like the longest time in the world. Birthdays and Christmas were particularly elusive, but even something like 'see you in a month' was, to me, the equivalent of, 'NEVER SEE YOU AGAIN, MOO HAR HAR'.

This year seems to have gone bizarrely fast, so I can only conclude that, as a seventeen year old, I'm officially Getting Old.

This was one of the puddings we had for Christmas last week, but it seemed right for a New Year post as there's something very fresh and -- well, Nigella Lawson describes it as 'sing[ing] with springtime and Easter hopefulness'. Alright, so it isn't Easter, but I think the same description applies (...it DOES). While my version is a little more ramshackle (it adds charm!) than Nigella's, my coming year will probably be similar, haha.

Lemon Meringue Cake

From Feast by Nigella Lawson

Makes 1 8-inch cake.

125g butter
4 eggs
300g caster sugar
100g plain flour
24g cornflour
1 tsp baking powder
1/2 tsp bicarb of soda
zest of 1 lemon
4 tsp lemon juice
2 tsp milk
1/2 tsp cream of tartar
150ml double or whipping cream
150g lemon curd

1. Preheat oven to 190C (my mother insisted I put it at the top of the Roasting Oven in the Aga, which is why it's burnt on top --ooh, I'm so resentful). Line two 8inch cake tins.

2. Mix the egg yolks, 100g of the sugar, the butter, flour, cornflour, baking powder, bicarb and lemon zest together (in a Kitchen Aid, is the unspoken instruction after this) until pale. Add the lemon juice and milk and mix again. Divide the mixture between the two tins - there isn't a lot of it. Spread & smooth down with a spatula.

3. Whisk the egg whites and tartar until peaks form then slowly whisk in the rest of the sugar. Divide these between the two tins, spreading over the cake batter. Smooth one flat with a spatula, and use the back of a spoon to peak the other. Sprinkle 1 tsp sugar over the peaks and put in the oven for about 20mins.

4. With a skewer, pierce the flat-topped cake to check it's cooked through; no sponge mixture should stick to the skewer. Let both cakes cool in the pan on a wire rack.

5. Nigella says calmly at this point, 'unmold the flat topped one onto a cake stand or plate, meringue side down'. Ignore her; unmolding these buggers is easier said than done without crushing all the meringue - not a problem for the flat one, but definitely for the peaked one. This involved three of us, all with fish slices, to get the cakes unmolded. I hope you have help and fish slices to hand.

6. Whisk the cream until thick but not stiff and set asidde. Spread the flat sponge surface of the first cake with the lemon curd and then spatula over the cream and top with the remaining cake, meringue uppermost.


Ramshackle appearance aside, this cake is beautiful and was a massive hit at Christmas (although I admit I dusted it with icing sugar rather than parade the burnt bits, so I can't exactly say there's a story with a moral or anything coming up). And I think I definitely prefer it to lemon meringue pie, just because it's a bit different, and there's something special about it.

If I was in a cheesy mood, I'd finish with, 'I hope 2008 also has something special in store for you', but that's just a bit vile.

...On the other hand, I'm getting ready to go out for a New Years party, and time is of the essence. I hope 2008 is special for you, all over the place. XD

Indy.x

Wednesday, 26 December 2007

Merry Christmas Everyone!


Firstly - I hope everyone had a great Christmas yesterday!!

We always have the whole extended family over, and since I get on far better with my extended family than my immediate one, a good time was pretty much had by all. I should mention that I got a couple of stunning vegetarian recipe books, so look out for those in the near future ^__^

My mum is famous for her Christmas dinner, so rather than encroach on her noble territory I was head of puddings this year. The temptation to list everything is enormous, but since I begin to feel queasy again if I think about food too much now I'm going to cut straight to... this:


Probably the aesthetic highlight of the meal, although I can't say I'm too into chocolate cake-y things (I prefer both pure chocolate and pure cake; I don't go in for adulterating a good thing XD). Nonetheless, it got rave reviews from everyone who had some, so I recommend it - you can still make it for New Year's Eve!


Since it's unlikely I'll eat anything but leftovers for the next week (or eat anything at all, the way I feel now - about twelve times bigger than usual, for the record), I can guarrantee you'll be seeing more of the Christmas desserts soon XD

Chocolate Christmas Pudding
Good Food Magazine, January 2008 edition
Prep: 40 mins + chilling. Serves 8 (rubbish, it serves twice that, especially at Christmas when everyone's full anyway)

For the sponge:
4 eggs
100g caster sugar
100g self-raising flour
50g cocoa
85g butter, melted
50ml espresso with 2 tbsp Tia Maria (none of my family like coffee so I left this out, but added a capful or so of dark rum)

For the mousse:
3 eggs, separated
50g caster sugar
175g dark chocolate
200ml double cream

For the ganache:
142ml pot double cream
100g dark chocolate
1 tbsp golden syrup
1 tbsp Tia Maria + 1tbsp espresso (I added rum again instead)

+ some dark & white chocolate to decorate

1. Oven to 200C. Line a 22 x 31cm swiss roll tin with baking paper (we used a tin double this size and I'd recommend it; it makes the sponge thinner but gives you a lot more to work with when it comes to fitting it to the bowl). Tip a tbsp of spare cocoa powder over the tin and turn it to coat it evenly, tapping out the excess.

2. For the sponge, beat the eggs and sugar until thick enough to hold a trail. Fold in flour and cocoa powder, then swirl in the butter and fold through. Tip into the tin, bake for 10mins until just firm, then cool under a clean tea towel. Or perhaps don't.

3. For the mousse, beat the egg yolks and sugar until thick and pale. Melt the chocolate and loosely whip the cream until it just holds its shape. Quickly beat half the cream and all of the chocolate into the egg mix, then gently fold in te rest of the cream. Whisk the egg whites until softly peaked, then fold in.

4. Grease a 1.4 litre/ 2.5 pint basin or bowl with a little oil. Line with cling film, leaving some overhang. Then to build the pudding, cut a circle of sponge to fit the bottom of the basin (we used a large cookie cutter) and fit it in. Then cut about 7 x 10cm sloping rectangles (trapeziums? Man, I always sucked at maths) from the sponge and fit them tightly around the bowl. Sprinkle with the rum (or coffee/Tia Maria).

5. Fill the bowl halfway with mousse and use what's left of the sponge to top the mousse with a snug-fitting circle of cake. Spoon in the rest of the mousse then cover with the overhanging cling film. Chill for at least 4 hrs till firm (we left it overnight) then turn onto a plate.


6. For the topping, heat all the ingredients gently in a bowl over a pan of simmering water until the chocolate melts. Leave to cool, stirring occasionally, until thick and glossy (MAKE SURE IT'S THICK ENOUGH TO SPREAD PROPERLY! The worst thing would be to be too quick over it and have it run everywhere. For probably the first time in my life I actually had some patience, and left it until it was almost set). Spread over the turned out pudding in lovely swirls.


Good Food's helpfulness runs short on decorating, but you can make chocolate curls using a potato peeler against the long side of some white or dark chocolate. What looks best, however, is to make caraque (the long ones) - to do this, I melted a few squares of chocolate (white looks best, but I did a bit of both) in a bowl and then spread it over an acrylic chopping board and left it in the fridge until it had set. Then use a sharp knife and pull it over the set chocolate towards you slowly, and you should get long chocolate curls coming off. This is what the Parragon book 'Chocolate' tells me, anyway; I had trouble with it, which is why my caraque are pretty crap.

Meh.

...Aaah, come on, it looks like a giant truffle! It's like chocolate, but in GIANT form!


I can't be the only person who gets excited over this sort of thing.

Thursday, 20 December 2007

Glad Tidings?

I'm not exactly organised with Christmas this year. I'm not exactly organised with ANYTHING this year, least of all blog posts. So I don't really come bearing tidings of great joy or anything like that.

The stained glass window biscuits above are part of the presents I gave to my friends this year (we broke up from school yesterday), but I'm not going to give you the recipe for several reasons:


1. I don't actually know if they taste very nice. They're edible, and very pretty, but their taste is pretty... meh. This is lost on festive teenagers, so I don't feel guilty about palming them off on my friends

2. It's not a very exciting recipe. In fact, if you want to make these, just use a normal shortbread or sugar cookie recipe or whatever, and cut down the sugar a bit. These don't have much sugar in at all because of the sweet in the middle.
3. I was spectacularly unsuccessful at making these (example: I burnt the first batch cause I'd deviated from the recipe and not allowed for it, and I fell over the dog when getting the third batch out of the oven and dropped half of them. I then had to eat them, because I can never bring myself to throw food away. This is not a good recipe for hygeine or obesity).

All you have to do is cut the cookie dough into whatever shape you like and use a very small cutter (or the wrong end of a piping thingy, if you want them to be circular) and put half a boiled sweet (I used Fox's) in the gap. Bake them for however long (don't ask me...) and let them cool COMPLETELY on the tray before you lift them off, so that the sweet has set.


Likewise, these are not tremendously original - they're just regular shortbread (240g or 80z butter and flour each, and 60g or 2oz sugar) but I added some cinnamon, mixed spice and orange zest to make them a bit Christmassy. I also sprinkled a little caster sugar over the top once they'd come out of the oven and were still warm, to make them a bit sparkly. These are going to be for my cousin, since I only ever buy him food anyway.

Presents left to buy: 7
Days til Christmas: 5
Heart attack: impending.

Sunday, 9 December 2007

SHF#1: God Save The Queen!


I'd been at a loss for what to post up here next last week, mostly because I was away for half of it (a university interview in Oxford ^__^), and on my return we survived a few days on meals hauled out of the freezer and such. But then I got an email from Zorra about this month's Sugar High Friday, with its pudding theme.

SHF #38 - The proof is in the Pudding!

I had one of those moments. That vision-of-sugar-plums moment where my eyes glaze over and I start drooling with anticipation.

Pudding is one thing I can do.
Alright, so France has its patisseries, and America has pumpkin pie, but in Britain, if something's thick and stodgy and sits in your stomach for about a week since you ate it? We're good at that. So I went through the stack of recipe books at the end of my bed (I have no shelf space to put them on, so I hide them under my duvet when the cleaner comes) to find a quintessentially British pudding.

Within about a minute I'd found at least three recipes for Queen of Puddings, and my mind was made up.

I love the Queen. It's one of those things. Immediately upon entering my room you see this poster on the end of my desk, and at school we can't go a day in the Common Room without drinking a cup of tea 'to the Queen!' In fact, just to reinforce my point - about an hour ago I got a text from my friend Ed Philip adressed to me Elizabeth, signed 'HRH', which made me laugh no end.

So since this is my very first blogging event, I'm hoping the Queen is on my side ^__^

To make this pudding my own I combined about three similar recipes I came across and changed the base a bit- usually it's just white breadcrumbs, milk and caster sugar, but I made it into a chocolate affair and replaced the raspberry or strawberry jam layer with black cherry. This is also generally made in a large dish but I made it in individual ramekins for a bit of a change =]

Chocolate Queen of Puddings

50g dark chocolate
400ml milk
2 heaped tbsp drinking chocolate powder (cocoa powder would also work, but we had none in, and you'd probably need to add more sugar if you used it)
80g breadcrumbs (usually they'd need to be white, but with this being a chocolate version I don't think it matters)
25g + 100g caster sugar
2 eggs, separated
4tsp black cherry jam

1. Oven to 180C. Break up the dark chocolate and melt it in a saucepan with the milk and drinking chocolate until it has melted and all combined together.

2. Place the breadcrumbs in a large bowl with 25g caster sugar and pour the chocolate milk over it. Mix well and leave to soak for about half an hour, then beat in the two egg yolks. Divide between four ramekins and bake for 30 mins, or until firm.

3. Whisk the two egg whites in a large clean bowl into soft peaks. Gradually, whisk in the 100g of caster sugar to make a thick, glossy meringue.

4. Spread a heaped teaspoon of black cherry jam over the top of each dish of baked chocolate mixture, then pipe or spread the meringue over the top of that (I used a flat knife to twist it into peaks). Return to the oven for 10-15 mins (mine took 12) until the meringue is crisp and golden.


Excuse the poor photography D= My camera's being even more temperamental than usual, and the terrible weather (meaning bad lighting) doesn't help much. Though probably the real problem is more about the person behind the camera... X__X

Tuesday, 27 November 2007

A Cheesecake Experience


I'm pretty experienced with cheesecake.

(Whit-woo)

No no no, what I mean is, I got an A* at GCSE Home Ec, back in the day (yeah alright, two years ago then). It pretty much entailed being given a specification - like, choose a dessert and find ways to make it more healthy, or add fruit, or whatever - and, provided it ticked the right boxes, you could make whatever you like.

I made cheesecake.

Er, more or less every week.

Cheesecake is just... perfect. Need to add fruit? Stick some raspberries on top! Need to show a particular skill? Use a recipe with gelatin in it! Need to use the fridge? Cheesecake! Need to use the oven? Cheesecake! Want to make my favourite dessert in the world? Cheesecake! Not only can it be chilled, baked or set, you can used more or less whatever ingredients you fancy, whatever base you're in the mood for... I thought I'd pretty much explored every avenue cheesecake had.

APPARENTLY NOT!

What with being such a talented procrastinator, I was looking round a couple of food blogs a while ago and found this Japanese cheesecake recipe on Su Good Sweets. Japanese + Cheesecake?!? = THIS HAD TO BE GOOD. I saved it, printed it off, and promptly forgot all about it.

That said, this is only cheesecake as I know it by merit of the fact it, you know, contains cheese. You should have seen me when I re-found this recipe the other week. 'WHERE IS THE BASE?!' I cried, my brain addled. 'WHAT'S GOING ONNN??'

This is what's going on, my friends.


Su Good Sweets

My fingers are getting tired of typing 'cheesecake'. Bear with me, little fingers.


Rather than type out the recipe, you can find it at the link above, but I'll add a couple of things:

+ Cornstarch, as far as I can tell, means two different things in that ingredients list. The one describing cake flour refers to what we call cornflour in Britain, and the second one is cornstarch. At least, I hope so. I just used regular plain flour rather than cornflour, but I used a little less than it said and added a little less cornstarch... just on a whim, apparently.

+ It says it needs an 8-inch cake tin, but either that's a very deep tin, or I can't measure things; I used a 9 1/2 inch springform tin (and I was lucky in that the batter didn't leak out) and couldn't have done with a smaller one.

+ This didn't have a very strong green tea flavour, but I think that was my fault, as I was worried I'd leave the teabags in too long and it'd end up being too bitter (it didn't). I'd probably leave them a bit longer next time.

+ It says it takes 1 hour 10 mins - I checked it after 40 and it was perfectly golden on top, so you might want to cover it with foil after 40-45 mins to stop it over-browning. I also didn't leave it the full time after that - probably just under an hour overall. I don't think it really needed any longer, either, but you'd probably have to judge for yourself ^__^


Overall = 1664.8 cals. In a 9.5 inch tin, it serves about ten, at 166 cals each. You wouldn't find that with a Western cheesecake!


...If only I'd known about this two years earlier, when the specification was to make a dessert healthier. X__X Cheesecake couldn't tide me through that one...

Friday, 23 November 2007

Bread Of Heaven...


If I lived next door to you (and we'll assume that I don't, since it would be a crazy coincidence if the people who do live next door to me were reading this. Hey, if you are, let me know, it would be like a miracle) this is the point where I'd be coming round to your house with a loaf of warm raisin bread and begging your forgiveness for ignoring you for so long.

Actually, I probably wouldn't do that; I'd probably do the British thing of repressing my feelings and settle for nodding awkwardly at you in the street. But fortunately you don't have to worry about that, since you don't live next door to me.

The point is, I'm really sorry for the big delay in this post (one word: A-Levels. Does that count as one word? One full word and one hyphenated letter, then). So as an apology, I'm bringing round a virtual loaf of raisin bread, and a promise that now my English Coursework is finished, I can be a little more regular round here. It'll be the blogging world equivilant of camping out on your doorstep with (okay, so it's half eaten) heaps of bread and cake under my arm, I swear. You'll be glad to see the back of me.

Due to internet limitations however, you may want to make your own bread in the meantime.


Raisin Bread
From a River Cottage feature in Good Food Magazine, May 2007 (therefore not on the GF website)
Prep: 30 mins
Proving/rising/etc: 2-2.5 hours
Cook: 20 mins


500g strong white flour (my dad got stuff with seeds in X__X as you may be able to tell from the pictures. It worked okay, but would be better just normal)
2 tsp salt
7g sachet easy-blend yeast
140g raisins
125ml milk
125ml warm water
1 egg
2 tbsp orange marmalade
1 tbsp sugar

For glaze:
1 tbsp sugar
2 tbsp water

1. Make the dough by putting the flour in a large mixing bowl withthe yeast, salt and raisins. Measure the milk into a jug with 125ml warm water, then break the egg into that and whisk it together with a fork. Pour the eggy liquid into the bowl of flour, spoon in the marmalade and stir it all together with a wooden spoon into a mass of soft, slightly sticky dough (if it's too sticky add a little more flour; if it's not coming together add a little more warm water).

2. Flour your work surface and turn the dough onto it. It'll be rough and saggy, so it has to be kneaded til it's smooth and bouncy, which should take about ten minutes intensive kneading. If you're familiar with my approach to cooking, you'll know that patience is not a virtue I posess in abundance; I whacked it around a bit while watching Neighbours and hoped it would be enough. You know, that's probably the influence for the Neighbourly theme on HLS today, I didn't realise that until now...

3. By the time your arms have got insanely tired, you can shape the dough into a neat ball, put it back in the bowl and cover it with cling film (or a damp tea towel) to prove. Put it somewhere warm, away from draughts, but not too hot (like a radiator) or the yeast will die. If you have an Aga, apparently you can leave it in the warming oven with the door open, my mum tells me (but I didn't know this at the time, so I just left it in the kitchen).

4. Leave to rise for about 1.5 - 2 hours. I went off and did some coursework redrafting for an hour or so, and then I got bored, so I casually overlooked the rest of the rising time. It should have risen to 'a great big puffy ballooned mass, at least twice its original size'. I hadn't been paying attention when I'd left it, so I had no idea what its original size had been. Therefore I pretended it was done.

5. Grease the base and sides of a large loaf tin (aprox 13 x 23 x 7cm). Pull the dough out of the bowl and knead for about thirty seconds on the work surface, then flatten it out a little into a round disc. Roll it up roughly like a carpet so it's a puffy sausage shape, then tuck the sides underneath the base so it's like a pillow. Place it in the loaf tin; it should come about halfway up the sides.

By some miracle, mine did... I don't know how that happened seeing as it was so unlike a 'great big puffy ballooned mass' otherwise.

Cover it with cling film or the tea towel again and leave to rise for 20- 25 mins. I had a guitar practice (grade four exam on Monday, sigh...)


6. Heat the oven to 220C. Place the tin in the oven and leave to bake for about 12 mins, then turn the oven down to 190C for another 10 mins. I didn't need quite this long (perhaps I put it at a too high heat?). To see if it's done, turn the bread out of the tin and tap on the base - it should sound hollow. If it doesn't, but it directly on the hot oven shelf for 10mins.

7. Let the bread cool on a wire rack, and begin to make a glaze for the outside. Put the sugar and water in a small pan and stir with a wooden spoon over a medium heat until the sugar has dissolved to make a syrup. Let it simmer for 1 min, then remove from the heat. Use a pastry brush to brush the warm syrup all over the top and sides of the bread; this looks stunning ^__^

You might be able to tell from the pictures that my bread wasn't actually fully cooked in the middle after all; it was still doughy on the inside (oops). Fortunately my mum and I both like it like this <3


I made this in the evening when there was no natural light, so I don't have any pictures of the glazed outside in nice light, since it was mostly eaten by then, haha. But you can get the idea from these:


This one on the right is what I believe professional food photographers call 'giving up and using the flash'...

Sunday, 11 November 2007

Indy Is Stuffed


...and also makes very bad puns. In my defence, with this particular meal, I could also have joked 'Indy is squashed', which would have been even worse. And not really have made that much sense.

Anyway.

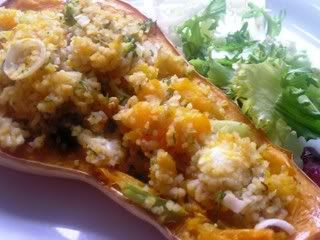
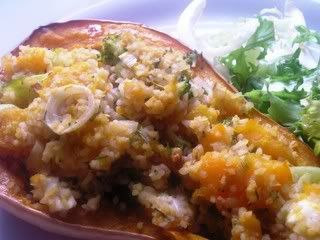
Following my movement to abolish cutlery, I'm taking the culinary revolution a step further today and expanding on the idea - as of now, I'm rejecting all crockery as well. No more plates; from this day forth I'm going to eat all my meals out of a halved butternut squash. Bwahahaha!

Alright, so I did actually eat this off a plate. But only because I was having lunch with my mother and she would have shouted at me otherwise (adults, hunh). But my big news of the weekend was that I actually got two letters offering me university places yesterday morning (!!!) cue much excitement and hysteria (the happy sort). So as a result, I've resolved that as soon as I go to uni next October, I'm going to make this very meal and eat it straight out of the halved squash. Outwitted!

...Aren't I just overflowing with teenage rebellion?

Photo Sharing and Video Hosting at Photobucket


Stuffed Butternut Squash
Adapted from Tesco HLC Magazine
Serves 2
Takes 1 hr 10 mins (mostly cooking rather than preparation though)
285 calories per serving.
9.3g fat per serving.

1 medium butternut squash
300ml vegetable stock
50g buckwheat (We couldn't find this, so used bulgar wheat, which worked just the same way. Bulgar and buckwheat will probably turn out to be the same thing now, or something. Apparently bulgar wheat is very cheap though, which is probably why we had it in X__X)
2 spring onions, finely sliced
40g broccoli, steamed (I just cooked it in a pan of water)
15g walnuts, chopped finely
1 tsp harissa paste (...didn't have any)
25g feta cheese, crumbled
1 tbsp fresh chopped parsley (used chives as my mum had thrown the parsley out)

1. Oven to 200C. Halve the squash horizonally and scoop out all the seeds and gunk from the bottom bit with a spoon, then place on a roasting tray (cut side up) and bake for 40 minutes, or until tender.

2. Meanwhile, boil the stock in a saucepan and add the buckwheat (or bulgar wheat). Cover and simmer for 30 mins or until tender (this took about 20 mins for me, but I don't know if that was because I used the different type of wheat).

3. Place all the other ingredients in a bowl and mix well, then add the wheat (the recipe says to drain it, but mine had absorbed all the water so that was unnecessary...) and mix together.

4. Read the Sunday papers for a bit until the butternut squash is cooked, or else make a pizza for your little sister's lunch, since she won't each anything remotely healthy. Then remove the squash from the oven and scoop out the middle flesh. Chop (or bash it with your spoon) and mix it with the other stuffing ingredients. Spoon it all back into the halves of the squash.

5. Return to the oven for another 15 minutes before serving. Phwoar! ♥


Photo Sharing and Video Hosting at Photobucket

Sunday, 4 November 2007

'Anything Off The Trolley, Dears?'

'Go on, have a pasty,' said Harry, who had never had anything to share before, or, indeed, anyone to share it with.
-Harry Potter and the Philosopher's Stone, JK Rowling.

I know I'm too late for Halloween, quelle surprise, but since we had pumpkin floating around (not literally, or that really would be spooky) from our lantern, I decided to improvise a recipe with a bit of a theme...

Anyone who's read Harry Potter (oh come on, is there anyone in the world who HASN'T read Harry Potter?) will be familiar with pumpkin pasties, which make constant appearances across the series. My friends & I all love it, hence our themed party this summer when the last book came out:


(On the left is my best friend as Tonks, and on the right is me as Bellatrix ^__^ The fun to be had with spray cans of hair dye...)

So since I wasn't up to much on Halloween (our celebratory party was actually on Friday instead) I came over all Molly Weasley-esque and decided to recreate the food =D

My mum avoided the kitchen while I was cooking, as I generally don't like people hanging round, breaking her silence only to darkly predict that they would taste disgusting (she once tried to cook with pumpkin after Halloween with no success, and didn't want me to have a go apparently, haha) but they were actually lovely; just like a vegetarian version of a regular Cornish pasty. If I hadn't known it was pumpkin I'd have had no idea what the mystery ingredient was, to be honest.

Naturally my mother is extremely bitter about this as a result.

Pumpkin Pasties
My own recipe.
Makes 12- 13 pasties.
219 calories each (13) or 237 each (12)

1 tbsp olive oil
300g pumpkin
1 onion, chopped
1 potato, cut into cubes
500ml hot vegetable stock
3 tbsp plain flour
1/2 tsp thyme
500g ready-to-use shortcrust pastry
about 50ml milk to glaze


1. Oven to about 220C (I did mine at 200C for 18mins but the higher temperature would shorten this a bit). Heat the olive oil in a large pan then add the chopped onion and cook for about five minutes, until softened and golden.

2. Cut the pumpkin into squares of about 1 or 2cm (mine was scooped from the inside of the pumpkin, so I just cut it into bits really). Add the pumpkin and cubes of potato to the pan, and season with salt, pepper & thyme. Pour in the vegetable stock and bring to the boil before leaving to simmer for ten minutes or so. The pumpkin should be tender.

3. When I did this I was hoping the liquid would mostly evaporate but it didn't really, so I stirred in the flour (one tablespoon at a time, see how much you need cause you might not want it all). Give it a good stir to get rid of lumps, and let the mixture thicken a bit over a low heat. It shouldn't be too sloppy, you're going to be putting it in a pastry circle. Leave to cool.

4. Roll out your pastry fairly thin (I was worried they'd be too thin, but it was fine, so there'll be enough). I used a smallish dessert bowl to cut around to make medium sized circles (at a guess, about 15cm across?) Cut out 12 or 13 circles.

5. I found that either one generous tablespoon or two stingy dessertspoons of filling was enough for the pastry circles, otherwise they'd collapse. Put the filling in the centre of the circle, then use a pastry brush to brush milk all around the outside. Fold the pasties in half, into a semi-circle, and use your fingers to press the edges firmly together. Then use a fork to print around the outside edges.

6. Brush the pasties all over with milk to glaze and place on a large baking tray in the oven at 200- 220C. They should take about 15 minutes (mine took 18 at 200C) but keep an eye on them; when the pastry is golden brown take them out, as obviously the filling is already cooked.


My friend Tonks (^__^) and I ate these pasties last night before going out to the bonfire and firework display near my house. What can I say, it was just like being on the Hogwarts Express. Sort of. If you used your imagination a bit.

Well alright, not really, but they were good pasties.


Saturday, 27 October 2007

A Rice Ball Doesn't Belong In A Fruits Basket...

The part of a person that's remarkable is like the umeboshi on the back of a rice ball. All around the world, there are different colors, shapes, and flavors, but because it's stuck to the back, they might not be able to see their precious umeboshi. 'I'm not special,' each one would think, 'just plain ole rice.' Even though that's not true, and there is an umeboshi on the back. The reason people get jealous of one another is because they can see the umeboshi on other people's backs. Even now, someone might be feeling envious of something you don't recognize in yourself.

Before this summer I'd been dying to try onigiri, ever since I saw the Fruits Basket anime. Sometimes at home I feel a bit like a rice ball in a fruits basket, and I wanted so much to go to Japan and photograph eat all the amazing food and try out my (very basic) self-taught Japanese on real people (there's no one to practice the language with here, so I had no idea if I was speaking it properly or not).

This is where all the Asian people laugh at me a bit, I think.

Anyway, long story short, my friend has an aunt who is an international teacher in Japan so after exams I raised £812 for the flight, and we went and stayed with her in Yokohama for ten days. Best ten days of my life, no joke ^__^ And finally I got to try onigiri and buy bento boxes and discovered my spiritual home, heh.

I won't go into all of it now, but since then I've been dying to make rice balls (never satisfied X__X). I got Japanese Cooking At Home by Hideo Dekura for my birthday in August, sailed off into Manchester's China Town especially to buy short-grain rice and nori (seaweed) and finally got round to it... yesterday.

Fortunately, rice and nori have a fairly long shelf-life.

I didn't want to buy a massive sack of the stuff, so I couldn't actually get short-grain rice - the stuff I got says it's medium on the packet. Hence I was really worried that this wouldn't work out, and I'd just end up with lumps of sloppy rice all over the kitchen, but fear not! Medium grain worked just fine. If you're interested, I used Nishiki Premium Grade Rice. I also halved the amounts it said to use, in case it didn't work, hence my rice balls were baby-sized ^__^

O-nigiri (Rice Balls)
Took me about an hour? I honestly wasn't watching the clock when I made these yesterday afternoon. Also I slightly glossed over some of the 'leave for thirty minutes' parts of the instructions, so I can't be any more help.
From Japanese Cooking At Home by Hideo Dekura.

To prepare the rice:
4 cups (about 280g) short-grain rice -I used 140g
4 cups (480ml) water - I used 240ml
extra water

1. Place the rice into a bowl that holds twice the volume of rice. Pour water into the bowl until it just covers the rice, then hold it with one hand and stir it briskly for 10-15 seconds with the other hand. The water will go all milky. Tip the milky water out, covering the rice with one hand (I hope for your sake that your hands are bigger than mine).

2. Add water and repeat for a second and third time, but stirring for about 30 seconds now to get rid of the excess starch. Tip out the water then put the rice in a sieve and run cold water over it for a couple of minutes until the water runs clear. Leave it to drain in the sieve for thirty minutes. Or about 20, if you're me/impatient. I'm not condoning this or anything X__X.

3. The book says to place the rice and measured cups of water into a rice cooker pan now. Wipe the underneath of the pan with a dry towel and set it into the rice cooker, then switch it on and let it do it's crazy thang.

4. If you are British and don't have a rice cooker, or else you fail at life in any other way, I bunged the rice in a normal pan with the measured water over it and left it to cook over a low-medium heat that way. Occasionally use a wooden spatula to stop it sticking to the bottom of the pan, but don't try to over-stir it, in case that stops it sticking together. I don't know if there's a scientific basis for that, but I felt I'd better be careful with it.

5. Once the rice is cooked, leave it to steam for 20 minutes, cough cough.

Actually that works out fairly well, as you can now get groovy with your onigiri stuff-


You need:
Filling : 100g (4oz) salmon fillet - I was making this for myself and a vegetarian friend to eat, so I used left over cooked vegetables from a unofficial-ratatouille-type meal I had the other day. We had a dish of soft, cold vegetables sitting in our fridge, so I picked out all the bits of sweet potato and mashed them in a bowl with a fork, to use as filling.
The book suggests also using tuna with mayonnaise, pickles, bonito flakes with soy sauce, and, of course, umeboshi (Japanese pickled plums: see the top of the post for the cute Fruits Basket quote about this).

4 cups hot, cooked, short-grain rice. This is what you've just prepared, above. However it says four cups, and presumably if you made full quantites of rice you'd still have loads left. I can't quite work this out, but it turned out fairly convenient for me in the end as I'd made half-quantities of rice.

You may want:
Furikake - This comes in many varieties and is basically a pre-prepared mixture of seasoned condiments... according to the list in the book. I used sesame seeds and some strange black seed-like specks that I found in the cupboard, which looked suspiciously like charcoal. I hope it wasn't charcoal, but my friend ate the one with those on, so I can't be sure

Green peas, mushrooms, etc - You can use these to make your rice balls more exciting, basically. I got a small handful of frozen peas out of the freezer and left them in a dish to defrost while I did everything else, and added them to some of the rice later on.

Sheets or strips of nori (seaweed)

You also need:
A bowl of salted water (2 cups/240ml water with 1 tbsp salt). The water stops the rice sticking to your hands, and the salt helps preserve the rice balls.

1. Prepare the filling - if you're using salmon fillet, grill and flake it. Otherwise, improvise. Mash your sweet potato, if you're doing this my way, and season.

2. Use a moistened wooden paddle to place your rice in a bowl, and wet your hands in the salty water. Then take a bit of rice about the size of a baseball into the palm of your hand. I've never held a baseball, so I improvised, though I notice from the pictures in the book that Hideo Dekura has THE BIGGEST HANDS IN THE WORLD. NO JOKE. Presumably he has more balls than me. Teehee.

3. Make a hollow with your finger in the middle of the rice and place some filling into it. Then use both hands to mould the rice into a triangular or oval shape (I made three triangles and two ovals). Press the rice down just hard enough to keep the rice firmly together.

4. Set the rice balls down on a plate and sprinkle with furitake, if using, or else wrap a strip of nori around the edge or surface of the ball. If it's a triangle I like the wrap it around a corner, but on ovals it looks nice in the middle.

5. Make the rest of the rice balls in the same way, but add peas or sesame seeds or what-have-you to the mix if you want.

Like I said, I made five with the half-quantities of rice I used initially. The book does say this makes 5-7 triangular rice balls, but as his are so much bigger than mine, I think that does mean with twice the amont of rice. Honestly, men.

These tasted of Japan. ♥


The best thing about Japanese food? Knives and forks are a thing of the past! I'm going to try and pass a movement to abolish all cutlery, and these rice balls are at the fore-front of my campaign. Eat them with your fingers, with a little soy sauce! Or else, balance them on the edge of a knife and take great mouthfuls out of them, if you want to do it like my friend did last night.

I don't think she really got the idea.

Monday, 22 October 2007

The Cookie Dough Cupcake Bake Off


Rather than dedicate another full-size post to cupcakes... find my latest experiment here.

Wednesday, 17 October 2007

Ready For Your Chocolate Fix?

This cake is something of a legend in our family. It was my gran's, back in the day, and we've had it with every Christmas tea for the past hundred years or something (OK, so I don't know exactly how many years. But before I was born, so a lot). This cake demands respect.

Don't let the name deceive you; it's called praline cake, so it must have nuts in, oui? Non. Just chocolate, and digestive biscuits, and more chocolate, and sugar, and chocolate on top, and butter, and chocolate swirled over that. And so on and so on. It occured to me while I was making this that it's basically what we would call 'chocolate fridge cake' now.

But shh! The sacrilege! Respect the vintage recipe, back from the days when they didn't have fridges, and kept their milk in bowls of water covered in a damp cloth during the summer. I may have made that fact up, but it's none the less effective. Although if you put this cake in a bowl of water and covered it with a damp cloth you wouldn't really get far, so probably my gran had a fridge.


We usually make this cake in double quantities (far easier), eat one and freeze the other for Christmas, so it's completely unacceptable to bring it out early if you're feeling a bit hungry - as my sister learnt to her peril this summer when she was home from uni (where she lives on the Starvation Diet) and -overcome by living in a house where people actually spend money in Tesco, rather than Topshop- set about doubling her body mass in the most efficient way possible.

We all arrived home after school and work in the evening to find my Dad in a state of total outrage:

'SHE WAS EATING A PRALINE CAKE!'
We all gasped.
'OUT OF THE FREEZER!'
Looks of horror were exchanged.
'SHE HADN'T EVEN DEFROSTED IT!'
Could it be true?
'IT WASN'T EVEN ON A PLATE!'
The ground juddered as my grandmother turned in her grave.
'SHE WAS JUST EATING IT IN FRONT OF THE TELLY!'
You mean not giving it her undivided attention?
'HACKING BITS OFF WITH A KNIFE!'
Not in neat, chocolatey slices?'
JUST ON THE TABLE, STILL ON THE FREEZER BAG!'

He turned on my sister and pointed at her dramatically with a wavering finger. 'I CAUGHT HER IN THE ACT!'

My sister remained unperturbed, obviously thinking it was worth it.

My mum was on the phone to my aunt that night, relaying the trauma in tones of shock. It took about twenty minutes before my entire extended family knew about it. ('HAS SHE TOLD RACHEL?!' -- she had, and Rachel had wept down the phone).

I exaggerate, but honestly only a little.

For a while we feared a family rift, before my mum created a new family rule. If my sister was going to eat her way through her university holidays, she would have to make her own food. No one touched our praline cake.

This is a cake to take seriously.

...Incidentally, we got home a few days later and found an empty, unwashed couple of baking tins left out by the side of the sink. We searched the tins to find the rest of the cake she had apparently baked during the day, but to no avail. Had she made and eaten a whole cake on her own, in one day? We will never know...

Praline cake
My Gran's recipe
Prep: Literally about 10 mins
Refridgerate: 48 hours
Serves about 8-10 (at a guess) if pieces are smallish, or 1 if you're my sister.
Calories: 2840 in whole cake. Serves 8 at 355 p/s.

Makes one 'small' cake (my gran was always notoriously vague). I use a round 18cm tin, but it must have a loose-bottomed base.
I've adapted quantities from the ounces my gran wrote it in, as well as I can, but included the original measurements too.

125g (4oz) butter
125g (4oz) caster sugar
125g (4oz) dark chocolate (we use Cadburys Bournville)
250g (8oz) Digestive biscuits
1 egg
1 tbsp water
125g milk choc and about 25g white choc for decorating.

1. Cream the butter and sugar together until pale. Melt the dark chocolate in a microwave (takes a couple of minutes) and add it to the butter and sugar, along with a beaten egg and the water.

2. Crush the biscuits by putting them in a plastic freezer bag, tying the end and whacking it with a rolling pin. They should be fairly well broken up into crumbs- no big lumps, but not so it's just dust. Add them to the rest of the mixture.

3. Pour it into your tin and refridgerate for 48 hours (it doesn't really need that long though. Until set). It'll look something like this at this point:


Phwoar.

4. Remove the cake from the loose-bottomed tin before melting the milk chocolate and whooshing it all over the top. Drizzle a few rings of white chocolate over the top of that and use a skewer to swirl them together.

Excuse the fact that there's far more white chocolate than usual on the cake pictured - my little sister melted the whole bar so I used what I could and we made the rest into a sauce for icecream.

I've also made this cake into individual chocolates one time by just rolling spoonfuls of the mixture into balls in my hands and putting them on a baking tray to set in the fridge, then drizzling chocolate over them. This led my friend Sophie to call them 'chocolate bombs' - she couldn't get her head round the fact it's 'praline cake' when it's not in cake form - as she likes to give odd names to things. You should hear some of the things she calls me. In fact, I'm taking this to her house tomorrow as part of a belated birthday present; god knows what she'll try and name it this time ^__^


Bloggers who made this:
20.02.08 Maria at The Goddess's Kitchen

Thursday, 11 October 2007

Cause We Can Can Can...nelloni!


It's just one of those things that, every once in a while, I consider becoming vegetarian. I couldn't do it while I still live at home, cause it'd be too difficult with my family, but there's very little reason I shouldn't when I go to uni. By choice, my diet is practically vegetarian anyway (except for chicken, which I have fairly often at home, but chicken doesn't count. No, it doesn't. Cause chicken has, like, feathers. And the definition of an animal is that it has fur. So... fish as well).

Fine, alright. I eat very little red meat then.

But other than a tendency to point out my own vocabularic mistakes (on the subject, I'm not entirely sure that 'vocabularic' is actually a word . But it sounds like it should be. Alright, it isn't in my dictionary, but that just shows the inadequacy of my dictionary. I've conceded to red meat; vocabularic stays) the main thing standing in the way of any potential commitment is just the fact that I'm sort of... hugely greedy.

I am the person who sits next to you at lunch eyeing your apple crumble covetously until eventually I abandon my self-control and demand 'are you going to eat that?' when it looks like you're about to leave. By now, most people recognise the phrase 'are you going to eat that?' as really meaning 'because I am'. We often tell my friend Boy, who is thin as a rake and eats twelve times the amount I do , that he is going to be obese when he's twenty-one (He'll just wake up one morning and be morbidly obese. I cling to this hope), but to be honest, I've a feeling it's going to be me ^__^.

Boy is vegetarian, incidentally, but I'm sure that's nothing to do with anything. Now shush.

So basically it's not that I especially want to eat meat a lot of the time. I just like to know that I can, should the mood take me.

This recipe happens to be both vegetarian and absolutely gorgeous. The problem being that it serves four, very precisely, and so should you be as greedy as I am, there are no bits left in the pan to scrape out afterwards (working on the basis that if it doesn't come off a plate, it won't make you fat. No, really, scientists have proved that. Why am I so unconvincing today?)

Mushroom & Ricotta Cannelloni
Adapted from The Aga Winter Cookbook
Serves 4
240 calories per serving (but I changed the amount of pasta used)
Says it takes far longer than it does, but I'd estimate about 40-50 mins, including cooking. I'll stay vague, and then if it takes longer or shorter I can just say, 'well you must just be slow/super-speedy', and people won't hate me. So much.

15g dried mushrooms (soak them in boiling water for 15 mins beforehand)
15g butter
225g brown-cap mushrooms, finely chopped
250g tub ricotta cheese
4 sheets fresh lasagne
2 x 300ml tubs fresh tomato sauce
50g grated Parmesan cheese
salt & pepper
It also mentioned 1 tsp anchovy essence, which I missed out.

1. Drain and finely chop your soaked dried mushrooms. Lightly grease a large, shallow roasting dish with butter. You could use bakeaglide to stop it sticking but actually the butter helps you stick the cannelloni to the dish when it comes to it, so they don't unroll ^__^

2. Heat the butter in a large frying pan, add the fresh and dried mushrooms and cook on a low-medium heat for 10-15 mins (here is where I admit I have an Aga, so that's the simmering plate to me. I don't exactly know the ordinary-oven equivilant) until they are beginning to brown and any liquid has evaporated. Leave to cool.

3. Stir the ricotta cheese into the mushroms, add the anchovy essence if you want (I don't want) and seasoning, then mix until thoroughly combined. Eat quite a bit at this point out of scientific curiousity, should you so wish. Mmm.

4. The books says your fresh lasagne sheets should be 11.5 x 16.5 cm, but mine were twice that size. It also tells you to halve them widthways. Should you be using the smaller size, you don't wanna do that. That's just too small. Instead, use your 11.4 x 16.5 cm sheets as they are, or if they're like mine, cut them in half with some kitchen scissors. Place about 3 tbsp mushroom mixture along one edge of the lasagne sheets, then roll up to enclose the filling. You might want to sort of glue the edge with a bit of spare ricotta. Arrange the filled cannelloni seam-side down in the dish. You should get eight tubes out of it.

5. Pour the tomato sauce over (yeah, you do want it all) and sprinkle with all that lovely Parmesan. Huzzah. If you have an Aga, cook it on the grid shelf at the very bottom of the Roasting Oven; that's 190C to everyone else. The book says 30-35 mins but 25 was enough for mine. Keep an eye on it, anyway.

6. Serve it with a lovely green salad and garlic bread and tell yourself that it doesn't matter if you eat four cannelloni tubes yourself instead of two, since it's mushrooms and tomato, and they're vegetables.
Except actually tomato is a fruit.
Damn.


Sorry about these photos by the way; it's getting dark insanely quickly here now that autumn's drawn in and it's impossible to get good natural light for pictures. This was the best I could do. Sadface.

Monday, 1 October 2007

Un-seasonal Food


Firstly, massive apology for the silence yet again - serious internet problems going on. As far as I can tell, our provider is now going to ban us from going online between 4pm and midnight. What'cha gonna do.

As a result, this is an uber-quick post. Just so you know I'm still around.

In my absence, it seems to have become autumn (or so I have deduced, from the fact that I'm wearing four layers, a scarf, and a pair of Care Bear slipper socks) so naturally I'm going to post the least autumnal recipe I have hanging round, just to spite nature. Let me put it this way; I'm not a fan of the cold. Or dark. Or rain. Basically for the next six months or so I'm going to be walking round crying on the inside... so I'm putting this up now, before I get into hotpots and steamed puddings and all that jazz. Consider it a warning ^__^

Happy October everyone, by the way!

New Potato & Smoked Haddock Crush
Taken from Good Food Magazine (May)
Serves 4 (260 calories, 12g fat). Prep: 15 mins. Cooking: 35 mins.

Recipe can be found here.