Tuesday 27 November 2007

A Cheesecake Experience


I'm pretty experienced with cheesecake.

(Whit-woo)

No no no, what I mean is, I got an A* at GCSE Home Ec, back in the day (yeah alright, two years ago then). It pretty much entailed being given a specification - like, choose a dessert and find ways to make it more healthy, or add fruit, or whatever - and, provided it ticked the right boxes, you could make whatever you like.

I made cheesecake.

Er, more or less every week.

Cheesecake is just... perfect. Need to add fruit? Stick some raspberries on top! Need to show a particular skill? Use a recipe with gelatin in it! Need to use the fridge? Cheesecake! Need to use the oven? Cheesecake! Want to make my favourite dessert in the world? Cheesecake! Not only can it be chilled, baked or set, you can used more or less whatever ingredients you fancy, whatever base you're in the mood for... I thought I'd pretty much explored every avenue cheesecake had.

APPARENTLY NOT!

What with being such a talented procrastinator, I was looking round a couple of food blogs a while ago and found this Japanese cheesecake recipe on Su Good Sweets. Japanese + Cheesecake?!? = THIS HAD TO BE GOOD. I saved it, printed it off, and promptly forgot all about it.

That said, this is only cheesecake as I know it by merit of the fact it, you know, contains cheese. You should have seen me when I re-found this recipe the other week. 'WHERE IS THE BASE?!' I cried, my brain addled. 'WHAT'S GOING ONNN??'

This is what's going on, my friends.


Su Good Sweets

My fingers are getting tired of typing 'cheesecake'. Bear with me, little fingers.


Rather than type out the recipe, you can find it at the link above, but I'll add a couple of things:

+ Cornstarch, as far as I can tell, means two different things in that ingredients list. The one describing cake flour refers to what we call cornflour in Britain, and the second one is cornstarch. At least, I hope so. I just used regular plain flour rather than cornflour, but I used a little less than it said and added a little less cornstarch... just on a whim, apparently.

+ It says it needs an 8-inch cake tin, but either that's a very deep tin, or I can't measure things; I used a 9 1/2 inch springform tin (and I was lucky in that the batter didn't leak out) and couldn't have done with a smaller one.

+ This didn't have a very strong green tea flavour, but I think that was my fault, as I was worried I'd leave the teabags in too long and it'd end up being too bitter (it didn't). I'd probably leave them a bit longer next time.

+ It says it takes 1 hour 10 mins - I checked it after 40 and it was perfectly golden on top, so you might want to cover it with foil after 40-45 mins to stop it over-browning. I also didn't leave it the full time after that - probably just under an hour overall. I don't think it really needed any longer, either, but you'd probably have to judge for yourself ^__^


Overall = 1664.8 cals. In a 9.5 inch tin, it serves about ten, at 166 cals each. You wouldn't find that with a Western cheesecake!


...If only I'd known about this two years earlier, when the specification was to make a dessert healthier. X__X Cheesecake couldn't tide me through that one...
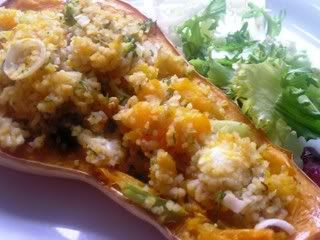
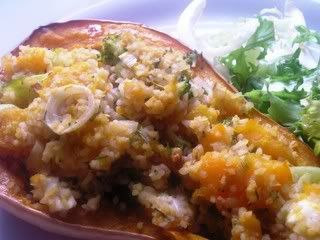
Friday 23 November 2007

Bread Of Heaven...


If I lived next door to you (and we'll assume that I don't, since it would be a crazy coincidence if the people who do live next door to me were reading this. Hey, if you are, let me know, it would be like a miracle) this is the point where I'd be coming round to your house with a loaf of warm raisin bread and begging your forgiveness for ignoring you for so long.

Actually, I probably wouldn't do that; I'd probably do the British thing of repressing my feelings and settle for nodding awkwardly at you in the street. But fortunately you don't have to worry about that, since you don't live next door to me.

The point is, I'm really sorry for the big delay in this post (one word: A-Levels. Does that count as one word? One full word and one hyphenated letter, then). So as an apology, I'm bringing round a virtual loaf of raisin bread, and a promise that now my English Coursework is finished, I can be a little more regular round here. It'll be the blogging world equivilant of camping out on your doorstep with (okay, so it's half eaten) heaps of bread and cake under my arm, I swear. You'll be glad to see the back of me.

Due to internet limitations however, you may want to make your own bread in the meantime.


Raisin Bread
From a River Cottage feature in Good Food Magazine, May 2007 (therefore not on the GF website)
Prep: 30 mins
Proving/rising/etc: 2-2.5 hours
Cook: 20 mins


500g strong white flour (my dad got stuff with seeds in X__X as you may be able to tell from the pictures. It worked okay, but would be better just normal)
2 tsp salt
7g sachet easy-blend yeast
140g raisins
125ml milk
125ml warm water
1 egg
2 tbsp orange marmalade
1 tbsp sugar

For glaze:
1 tbsp sugar
2 tbsp water

1. Make the dough by putting the flour in a large mixing bowl withthe yeast, salt and raisins. Measure the milk into a jug with 125ml warm water, then break the egg into that and whisk it together with a fork. Pour the eggy liquid into the bowl of flour, spoon in the marmalade and stir it all together with a wooden spoon into a mass of soft, slightly sticky dough (if it's too sticky add a little more flour; if it's not coming together add a little more warm water).

2. Flour your work surface and turn the dough onto it. It'll be rough and saggy, so it has to be kneaded til it's smooth and bouncy, which should take about ten minutes intensive kneading. If you're familiar with my approach to cooking, you'll know that patience is not a virtue I posess in abundance; I whacked it around a bit while watching Neighbours and hoped it would be enough. You know, that's probably the influence for the Neighbourly theme on HLS today, I didn't realise that until now...

3. By the time your arms have got insanely tired, you can shape the dough into a neat ball, put it back in the bowl and cover it with cling film (or a damp tea towel) to prove. Put it somewhere warm, away from draughts, but not too hot (like a radiator) or the yeast will die. If you have an Aga, apparently you can leave it in the warming oven with the door open, my mum tells me (but I didn't know this at the time, so I just left it in the kitchen).

4. Leave to rise for about 1.5 - 2 hours. I went off and did some coursework redrafting for an hour or so, and then I got bored, so I casually overlooked the rest of the rising time. It should have risen to 'a great big puffy ballooned mass, at least twice its original size'. I hadn't been paying attention when I'd left it, so I had no idea what its original size had been. Therefore I pretended it was done.

5. Grease the base and sides of a large loaf tin (aprox 13 x 23 x 7cm). Pull the dough out of the bowl and knead for about thirty seconds on the work surface, then flatten it out a little into a round disc. Roll it up roughly like a carpet so it's a puffy sausage shape, then tuck the sides underneath the base so it's like a pillow. Place it in the loaf tin; it should come about halfway up the sides.

By some miracle, mine did... I don't know how that happened seeing as it was so unlike a 'great big puffy ballooned mass' otherwise.

Cover it with cling film or the tea towel again and leave to rise for 20- 25 mins. I had a guitar practice (grade four exam on Monday, sigh...)


6. Heat the oven to 220C. Place the tin in the oven and leave to bake for about 12 mins, then turn the oven down to 190C for another 10 mins. I didn't need quite this long (perhaps I put it at a too high heat?). To see if it's done, turn the bread out of the tin and tap on the base - it should sound hollow. If it doesn't, but it directly on the hot oven shelf for 10mins.

7. Let the bread cool on a wire rack, and begin to make a glaze for the outside. Put the sugar and water in a small pan and stir with a wooden spoon over a medium heat until the sugar has dissolved to make a syrup. Let it simmer for 1 min, then remove from the heat. Use a pastry brush to brush the warm syrup all over the top and sides of the bread; this looks stunning ^__^

You might be able to tell from the pictures that my bread wasn't actually fully cooked in the middle after all; it was still doughy on the inside (oops). Fortunately my mum and I both like it like this <3


I made this in the evening when there was no natural light, so I don't have any pictures of the glazed outside in nice light, since it was mostly eaten by then, haha. But you can get the idea from these:


This one on the right is what I believe professional food photographers call 'giving up and using the flash'...

Sunday 11 November 2007

Indy Is Stuffed


...and also makes very bad puns. In my defence, with this particular meal, I could also have joked 'Indy is squashed', which would have been even worse. And not really have made that much sense.

Anyway.

Following my movement to abolish cutlery, I'm taking the culinary revolution a step further today and expanding on the idea - as of now, I'm rejecting all crockery as well. No more plates; from this day forth I'm going to eat all my meals out of a halved butternut squash. Bwahahaha!

Alright, so I did actually eat this off a plate. But only because I was having lunch with my mother and she would have shouted at me otherwise (adults, hunh). But my big news of the weekend was that I actually got two letters offering me university places yesterday morning (!!!) cue much excitement and hysteria (the happy sort). So as a result, I've resolved that as soon as I go to uni next October, I'm going to make this very meal and eat it straight out of the halved squash. Outwitted!

...Aren't I just overflowing with teenage rebellion?

Photo Sharing and Video Hosting at Photobucket


Stuffed Butternut Squash
Adapted from Tesco HLC Magazine
Serves 2
Takes 1 hr 10 mins (mostly cooking rather than preparation though)
285 calories per serving.
9.3g fat per serving.

1 medium butternut squash
300ml vegetable stock
50g buckwheat (We couldn't find this, so used bulgar wheat, which worked just the same way. Bulgar and buckwheat will probably turn out to be the same thing now, or something. Apparently bulgar wheat is very cheap though, which is probably why we had it in X__X)
2 spring onions, finely sliced
40g broccoli, steamed (I just cooked it in a pan of water)
15g walnuts, chopped finely
1 tsp harissa paste (...didn't have any)
25g feta cheese, crumbled
1 tbsp fresh chopped parsley (used chives as my mum had thrown the parsley out)

1. Oven to 200C. Halve the squash horizonally and scoop out all the seeds and gunk from the bottom bit with a spoon, then place on a roasting tray (cut side up) and bake for 40 minutes, or until tender.

2. Meanwhile, boil the stock in a saucepan and add the buckwheat (or bulgar wheat). Cover and simmer for 30 mins or until tender (this took about 20 mins for me, but I don't know if that was because I used the different type of wheat).

3. Place all the other ingredients in a bowl and mix well, then add the wheat (the recipe says to drain it, but mine had absorbed all the water so that was unnecessary...) and mix together.

4. Read the Sunday papers for a bit until the butternut squash is cooked, or else make a pizza for your little sister's lunch, since she won't each anything remotely healthy. Then remove the squash from the oven and scoop out the middle flesh. Chop (or bash it with your spoon) and mix it with the other stuffing ingredients. Spoon it all back into the halves of the squash.

5. Return to the oven for another 15 minutes before serving. Phwoar! ♥


Photo Sharing and Video Hosting at Photobucket

Sunday 4 November 2007

'Anything Off The Trolley, Dears?'

'Go on, have a pasty,' said Harry, who had never had anything to share before, or, indeed, anyone to share it with.
-Harry Potter and the Philosopher's Stone, JK Rowling.

I know I'm too late for Halloween, quelle surprise, but since we had pumpkin floating around (not literally, or that really would be spooky) from our lantern, I decided to improvise a recipe with a bit of a theme...

Anyone who's read Harry Potter (oh come on, is there anyone in the world who HASN'T read Harry Potter?) will be familiar with pumpkin pasties, which make constant appearances across the series. My friends & I all love it, hence our themed party this summer when the last book came out:


(On the left is my best friend as Tonks, and on the right is me as Bellatrix ^__^ The fun to be had with spray cans of hair dye...)

So since I wasn't up to much on Halloween (our celebratory party was actually on Friday instead) I came over all Molly Weasley-esque and decided to recreate the food =D

My mum avoided the kitchen while I was cooking, as I generally don't like people hanging round, breaking her silence only to darkly predict that they would taste disgusting (she once tried to cook with pumpkin after Halloween with no success, and didn't want me to have a go apparently, haha) but they were actually lovely; just like a vegetarian version of a regular Cornish pasty. If I hadn't known it was pumpkin I'd have had no idea what the mystery ingredient was, to be honest.

Naturally my mother is extremely bitter about this as a result.

Pumpkin Pasties
My own recipe.
Makes 12- 13 pasties.
219 calories each (13) or 237 each (12)

1 tbsp olive oil
300g pumpkin
1 onion, chopped
1 potato, cut into cubes
500ml hot vegetable stock
3 tbsp plain flour
1/2 tsp thyme
500g ready-to-use shortcrust pastry
about 50ml milk to glaze


1. Oven to about 220C (I did mine at 200C for 18mins but the higher temperature would shorten this a bit). Heat the olive oil in a large pan then add the chopped onion and cook for about five minutes, until softened and golden.

2. Cut the pumpkin into squares of about 1 or 2cm (mine was scooped from the inside of the pumpkin, so I just cut it into bits really). Add the pumpkin and cubes of potato to the pan, and season with salt, pepper & thyme. Pour in the vegetable stock and bring to the boil before leaving to simmer for ten minutes or so. The pumpkin should be tender.

3. When I did this I was hoping the liquid would mostly evaporate but it didn't really, so I stirred in the flour (one tablespoon at a time, see how much you need cause you might not want it all). Give it a good stir to get rid of lumps, and let the mixture thicken a bit over a low heat. It shouldn't be too sloppy, you're going to be putting it in a pastry circle. Leave to cool.

4. Roll out your pastry fairly thin (I was worried they'd be too thin, but it was fine, so there'll be enough). I used a smallish dessert bowl to cut around to make medium sized circles (at a guess, about 15cm across?) Cut out 12 or 13 circles.

5. I found that either one generous tablespoon or two stingy dessertspoons of filling was enough for the pastry circles, otherwise they'd collapse. Put the filling in the centre of the circle, then use a pastry brush to brush milk all around the outside. Fold the pasties in half, into a semi-circle, and use your fingers to press the edges firmly together. Then use a fork to print around the outside edges.

6. Brush the pasties all over with milk to glaze and place on a large baking tray in the oven at 200- 220C. They should take about 15 minutes (mine took 18 at 200C) but keep an eye on them; when the pastry is golden brown take them out, as obviously the filling is already cooked.


My friend Tonks (^__^) and I ate these pasties last night before going out to the bonfire and firework display near my house. What can I say, it was just like being on the Hogwarts Express. Sort of. If you used your imagination a bit.

Well alright, not really, but they were good pasties.